



Key Takeaways
- Layer your light: mix uplighting, path and step lights, wall wash, and overhead string lights instead of one bright floodlight.
- Keep everything warm — around 2700K — and dim; pools of glow with shadow between them read as luxury.
- Run it all on a 12-volt low-voltage system with automation so the yard fades up at dusk on its own.
A backyard you love at noon can vanish the moment the sun drops — or it can turn into the best room in the house. The difference is a lighting plan. Great **outdoor lighting ideas** aren't about flooding the yard with brightness; they're about layers, warmth, and letting trees, textures, and living spaces glow. Get it right and your whole property becomes an evening room you actually want to sit in.
The layered approach to outdoor lighting
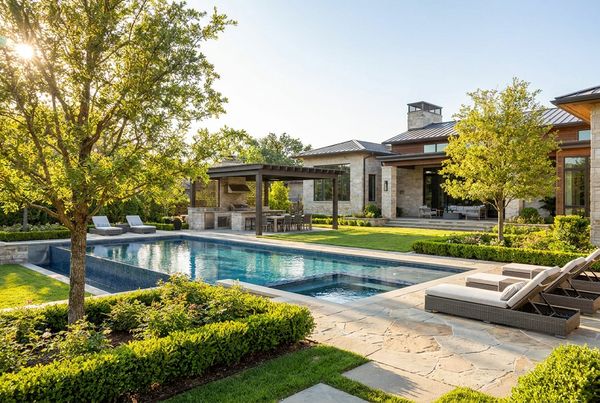
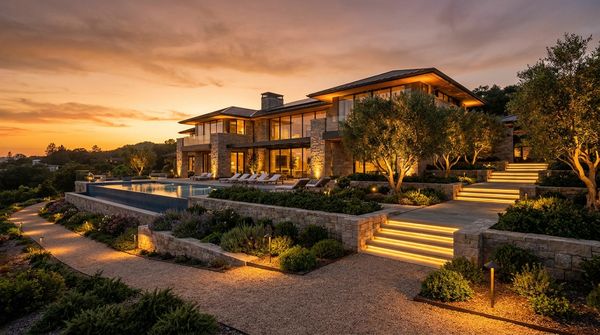
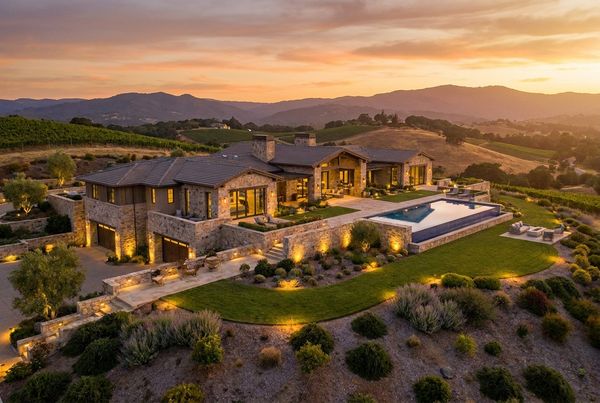
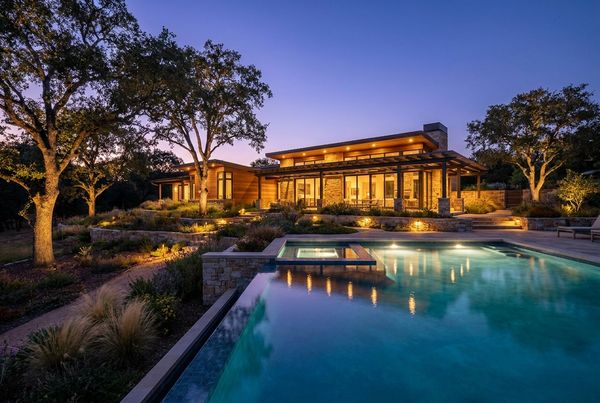
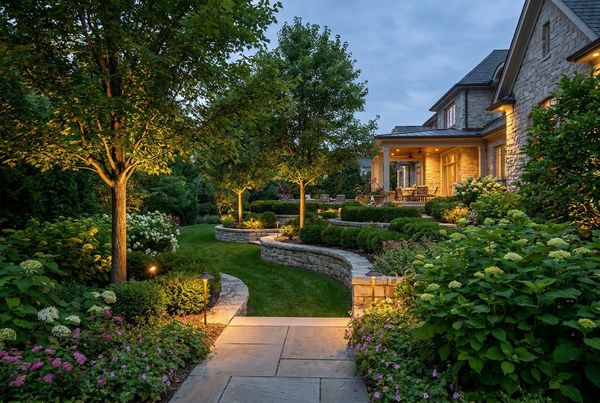
Every backyard that looks incredible after dark is doing the same handful of things, whether the owner realizes it or not. It's lighting verticals (trees, walls, structures), lighting the ground plane (paths, steps, beds), and lighting the living spaces (patios, dining, seating). Miss a layer and the yard feels off — a glowing patio floating in a black void, or beautiful uplit trees hovering over a pitch-dark walkway you can't safely cross.
Think of it the way a photographer thinks about a scene: a key light, a fill, and a background. Your specimen trees and structures are the drama, your path and step lights are the functional base, and warm ambient string or wall light is the fill that ties everything together. The magic is in the balance, not the wattage. Below we walk each technique — uplighting, downlighting, path and step, wall wash, string and bistro, and water-feature lighting — then get into color temperature, automation, cost, and the glare mistakes we see most.
A quick word on budget before we dive in, because it shapes every decision. A starter low-voltage package — a transformer and a handful of fixtures — typically runs a few thousand dollars installed. A full whole-yard design, once you add uplighting on several trees, path and step lighting, a couple of wall washes, string lights over the patio, and an automation controller, can climb into five figures. The good news is that the system is modular: build the core uplights and a path run now, then add wall wash, string, and feature lighting later as the transformer headroom allows. Roughing in extra low-voltage runs during any hardscape or planting work costs almost nothing and saves a fortune versus trenching a finished yard.
Uplighting, downlighting & moonlighting
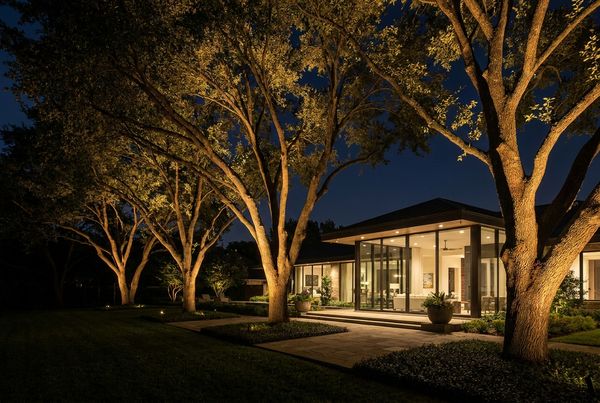
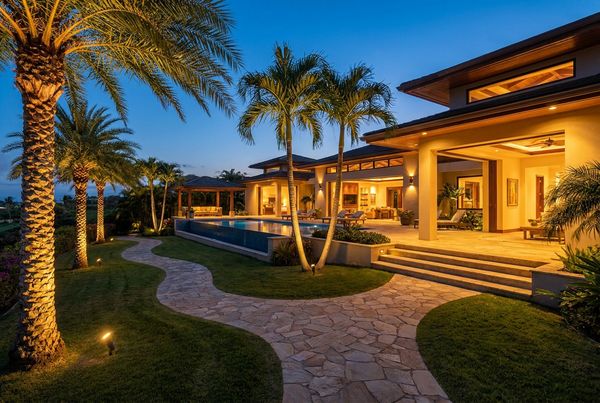
If you only master three techniques, make them these. Uplighting places a narrow-beam bullet or well light at the base of a tree, wall, or column and rakes light upward — it creates drama, height, and a sense of canopy overhead. A handful of uplit specimen trees does more for a yard's after-dark character than any other single move. Aim for the trunk and lower branches on a large tree, and let the beam feather out into the leaves so the effect reads as glow rather than a spotlight.
Downlighting does the opposite, casting light from above onto a patio, path, or planting bed. Its most beautiful form is moonlighting — a shielded fixture mounted high in a tree, aimed down through the branches so it throws soft, dappled shadows across the ground the way a full moon would. It's the most natural-feeling technique of all, and because the source is hidden overhead, it produces almost no glare. Pair it with uplighting on the same tree and you get light traveling both directions through the canopy, which is exactly the layered, resort-grade look trending into 2026.
The fixtures are small and sip power. Bullet uplights typically run 3 to 7 watts in LED; a downlight or moonlighting fixture is similar. Spend on beam control and fixture quality over raw output — a well-shielded 5-watt LED aimed correctly will always beat a cheap floodlight. Vary the beam angle, too: a tight spot for a tall trunk, a wider flood to wash a broad canopy or a multi-stem shrub. Mixing uplighting and moonlighting across the yard, rather than lining everything with identical fixtures, is what gives the space genuine depth.
Path, step & safety lighting
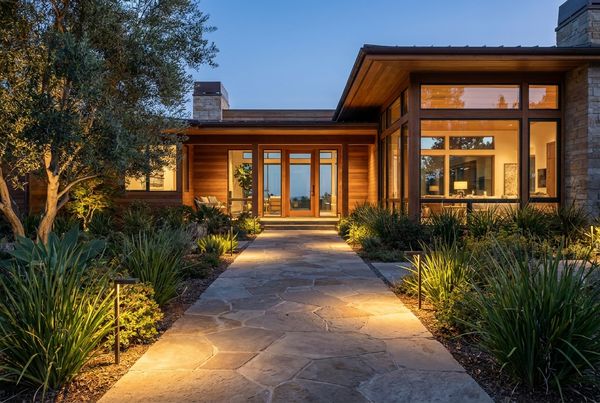
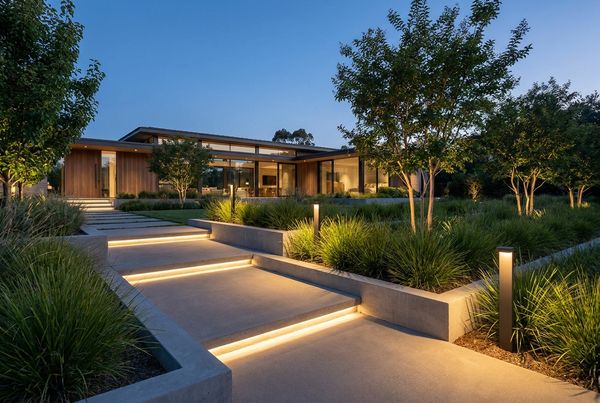
Ambiance can't come at the cost of a rolled ankle. Every change in grade — steps, a raised planter edge, the drop off a deck, the transition from lawn to patio — deserves a discreet light. The best safety lighting is felt more than seen: low, shielded fixtures that cast light down onto the surface, not out into your eyes.
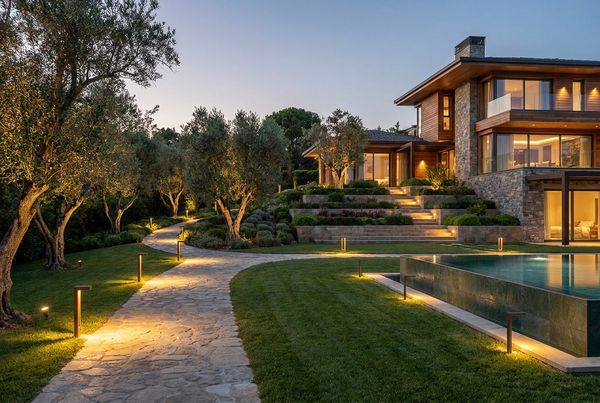
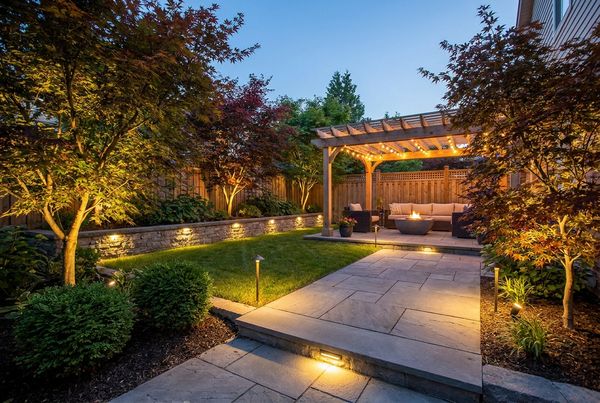
Space path lights generously — every 6 to 8 feet is usually plenty — and stagger them rather than lining them up like a runway. The goal is to light the path, not to create a row of glowing bollards; a soft, overlapping wash on the ground reads far better than a bright dot every few feet. For step lighting, put a light on every riser or, better, run a shielded LED strip under the tread nosing so the whole edge is legible without a single visible bulb. Recessed hardscape lights tucked under a wall cap or bench overhang do the same job around seating and retaining walls.
The electrical rules matter. Low-voltage path and step lighting is inherently safe and easy to add, but anything near water or on line voltage should be GFCI-protected and, when in doubt, handled by a licensed electrician. This is one area where restraint also happens to be safer — fewer, well-placed, shielded fixtures beat a yard peppered with glary path lights. If your walkways connect to a patio or wrap a pool, coordinate the step and coping lighting so the whole route reads as one continuous, legible path after dark.
Wall wash, grazing & water-feature lighting
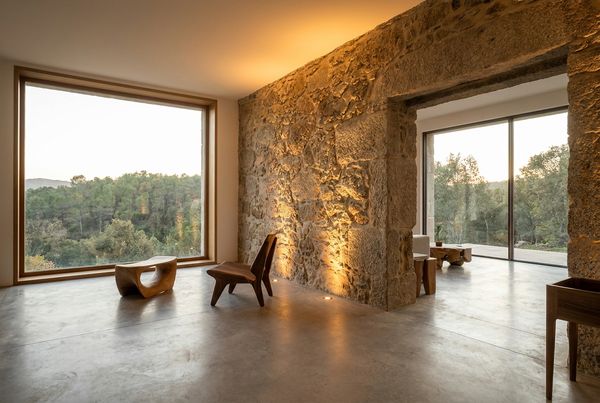
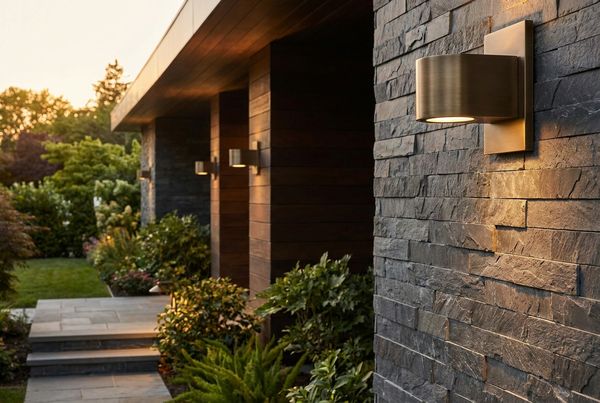
Vertical surfaces are where a lot of yards leave drama on the table. Wall washing places fixtures a foot or two off a flat surface to lay an even, soft blanket of light across it — perfect for a stucco facade, a fence, or a privacy screen. Grazing does the opposite: it sets the fixture right at the base of a textured surface — stacked stone, brick, board-formed concrete — and rakes light straight up so every ridge and shadow pops. Grazing is one of the highest-impact, lowest-cost moves in outdoor lighting because it turns a plain wall into a feature. If privacy structures are part of your plan, our pool privacy ideas guide pairs naturally with this layer.
Don't overlook garden beds and specimen plantings. A few low, shielded spotlights tucked among the plants light architectural shrubs, ornamental grasses, and seasonal color from within, giving the beds depth instead of leaving them as dark masses. Keep these dim and warm; the point is to reveal texture, not to floodlight the mulch.
Water features are the layer most people skip, and they're the most impactful dollar-for-dollar. A lit fountain, pondless waterfall, or basin turns moving water into a glowing nighttime centerpiece. The trick is to backlight or edge-light the feature so the water itself carries the glow rather than pointing a light at it head-on — a slim LED tucked behind or below a spill lip lets light travel through the falling water. If you're combining water with a nearby fire feature, you get both cool and warm reflections dancing at once, which is exactly the resort-style outdoor living look that's everywhere for 2026.
String & bistro lights over living spaces
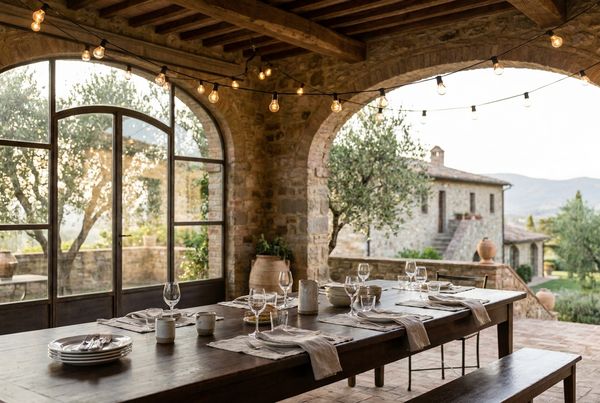
Nothing makes an outdoor space feel cozy faster than warm light overhead. String lights and bistro lights — the ones with visible warm filament bulbs — create an instant ceiling of glow over a patio, dining table, or seating area. They're the single most cost-effective ambiance upgrade in the whole yard, and they transform a bare patio into an outdoor room the moment they're switched on.
The key is to hang them with intention. Run them in straight parallel lines, a gentle zigzag, or a canopy radiating from a center point over a table, and keep them taut with a support cable so they don't sag into a droop. Mount points can be house eaves, posts, or a dedicated structure — a pergola is the ideal frame because it gives the strings a clean grid to follow and doubles as shade by day. Over a covered patio or outdoor dining zone, put the strings on a dimmer so you can dial the mood from bright-for-cards to low-for-late-night.
Choose warm-white bulbs (2700K) and, ideally, a shatter-resistant LED filament style rated for outdoor use — they draw a fraction of the power of old incandescent café strings and last for years. For a fuller overhead effect, layer string lights with the moonlighting from a nearby tree so the seating area glows from two sources at once; that overlap is what separates a patio that looks intentional from one with a single lonely strand.
What we think
Homeowners consistently over-spend on one big feature and under-spend on the layers that actually create atmosphere. If we had one budget, we'd put warm uplighting on two or three trees, string lights over the main seating area, and a couple of wall grazes on textured stone — then tie it all to a smart transformer so one tap sets the scene. It's the cheapest way to make a whole backyard feel expensive after dark.
Color temperature: why 2700K wins
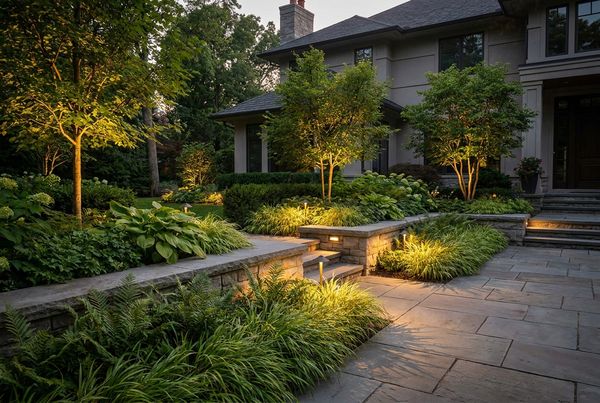
Here's the rule we come back to constantly: keep the whole yard warm. Color temperature is measured in Kelvin, and a quick mental map helps: 2700K is candle-and-lamp warm, 3000K is soft warm white, 4000K starts to feel cool and commercial, and 5000K-plus is daylight-harsh. For a backyard you sit and relax in, 2700K is the default and 3000K is the cool end of acceptable. Anything cooler makes a warm evening feel like a parking lot.
Warm light flatters skin, wood, and stone, and it makes plants look alive rather than sickly. The single most common mistake we see is mismatched color temperatures — a 2700K fixture on one tree next to a 4000K one on the wall — which makes the whole scene look accidental. Pick one warm temperature and stick to it across every fixture in the yard so the light reads as a single, intentional palette.
Resist the urge to run colored light into your landscape. A purple tree or a blue lawn is a novelty that gets old by the second night. Save any color play for a pool or a specific accent moment, and let the surroundings stay warm and calm — that restraint is exactly what separates a resort-feeling yard from a gas station. The table below is our default palette by zone.
| Where it is | Color temperature | Why |
|---|---|---|
| Patio, dining, seating | 2700K warm white | Flatters skin, wood, and stone; feels like a room |
| Trees & moonlighting | 2700K–3000K | Natural, inviting canopy; avoids a sterile look |
| Walls & stone (graze) | 2700K–3000K | Warm enough to reveal texture without going clinical |
| Garden beds & plants | 2700K | Keeps foliage looking alive, not washed out |
| Steps & paths | 2700K warm white | Safe and calm; never draws the eye to the fixture |
Low-voltage systems, automation & cost
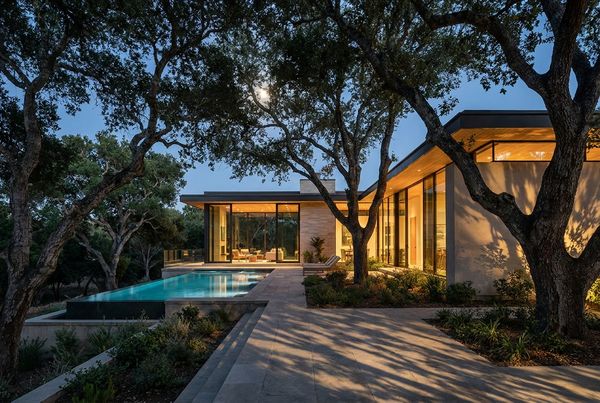
Almost all residential outdoor lighting today runs on a 12-volt low-voltage system: a transformer steps household power down to 12 volts, then feeds a run of LED fixtures on buried cable. It's safer around water and planting, cheaper to operate, and easy to expand — which is exactly why it has become the standard. Size the transformer with roughly 20 percent of headroom above your current fixture load so you can add lights later, and keep runs balanced to avoid voltage drop dimming the far end of a long line.
Automation is what makes the layers feel effortless. A smart transformer with app control and astronomic timers lets the yard fade up at dusk without anyone touching a switch, then step down late at night. Build a few named scenes — "dinner" dims everything warm, "party" brings up the string lights and features, "off" is genuinely off — and put them on a hardware button or a simple app tile, not buried three menus deep. Always keep a physical override; a lighting system that only works when the Wi-Fi does isn't one you can trust on a Friday night. In 2026, app-driven scene control and energy-efficient LED loads are effectively standard on new installs.
On cost, plan in stages. The table below gives realistic US 2026 ballpark ranges — treat them as planning figures, not quotes, since fixture quality, yard size, and trenching all move the number.
| Scope | Typical US 2026 range | What it covers |
|---|---|---|
| Starter package | ~$2,000–$4,000 | Transformer plus a handful of uplights and path lights |
| Mid-size design | ~$4,000–$9,000 | Uplighting, path & step, a wall graze, string lights |
| Whole-yard system | ~$10,000+ | Full layering, feature lighting, multiple zones, automation |
| String lights (DIY) | ~$100–$500 | Outdoor-rated LED café strings over a patio or pergola |
Avoiding glare & common mistakes
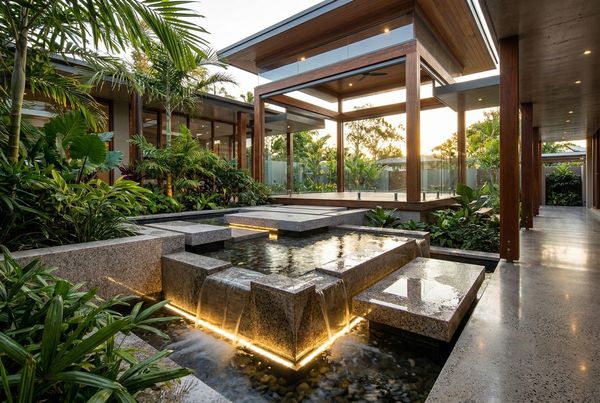
The failures are predictable, and every one is avoidable. Over-lighting is the big one — bright floodlights flatten the space, blow out the subtle glow of uplit trees, and create harsh glare that ruins the mood. Glare specifically comes from exposed sources: an unshielded path light at eye level, an uplight aimed across a sightline, a bulb you can see instead of the object it's meant to light. The fix is almost always to hide the source, shield the fixture, and aim it at the surface rather than the viewer.
A few more that quietly ruin otherwise nice yards: mismatched color temperatures, where a warm fixture sits next to a cool one and the scene looks unplanned; skipping the vertical layer, leaving beautiful walls and trees dark while only the ground is lit; runway path lights, an evenly spaced row of glaring bollards instead of a soft wash; and no dimmers or scenes, so every night is the same blast of full brightness with no way to soften it. The last one is easy to overlook at install and impossible to ignore once you live with it.
The cheapest fixes are almost always subtractive — remove a floodlight, dim a run, hide a source, add a shield — rather than adding more fixtures. Fix these and you're most of the way to a professional result. If you'd rather hand the whole plan to someone who can integrate it with hardscape and planting from day one, a good pool builder or landscape pro near you will save you the cost of reworking it after the concrete is poured.
Security without the floodlight look
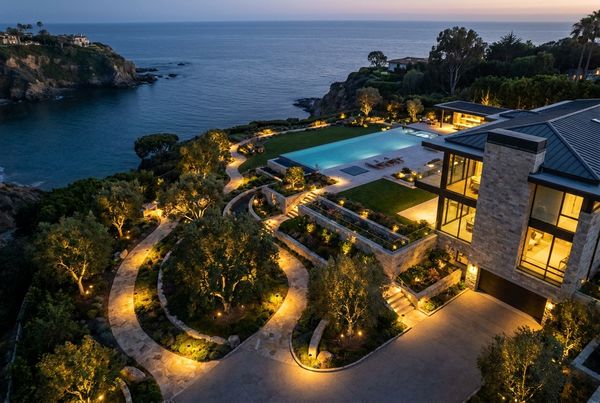
The tension people feel is between a warm, layered yard and feeling safe after dark, and the good news is you rarely have to choose. A yard that's already lit in layers — uplit trees, washed walls, lit paths — has very few black voids for anyone to hide in, which is most of what security lighting is actually for. A pool of soft, even light does more for real safety than a single harsh floodlight that blinds you and casts a deep shadow right behind it.
Where you do want dedicated security, use motion sensors intelligently. A motion-activated fixture at a side gate, a dark corner, or the equipment pad turns on only when something moves, so it's a deterrent without lighting the whole yard like a stadium every night. Aim it downward and shield it so it lights the ground, not the neighbor's bedroom. I like pairing a low, always-on warm wash with a brighter motion layer on top — the ambient light keeps the yard pretty, the motion light handles the "who's there" moment.
The one spot to never leave dark is the water and its edges. If your lighting wraps a pool, keep the coping, steps, and any grade change legible all night so nobody misjudges an edge — coordinate it with your pool lighting plan so the whole route from house to water reads as one continuous, safe path.
Solar, DIY, and what upkeep really looks like
I get asked about solar path lights constantly, and my honest take is that they're fine for a quick, cheap accent and frustrating as a real lighting plan. The cheap stake-in kind dim as the battery ages, glow a sickly blue-white, and fade to nothing on the exact overcast evenings you most want light. If you love the no-wiring simplicity, buy quality warm-white units and treat them as a supplement — not the backbone. A proper 12-volt low-voltage system will always look better and last longer.
On the DIY question: string lights, plug-in fixtures, and a small starter low-voltage kit are genuinely doable for a handy homeowner, and running an extra buried cable during any planting or hardscape work is smart no matter who finishes the job. But a whole-yard design — balancing voltage drop across long runs, aiming dozens of fixtures, and integrating automation — is where a pro earns the fee. If your lights are going in alongside a pool or a bigger hardscape project, a good pool builder or landscape pro can rough in the runs before the concrete's poured.
Upkeep is light but real. Expect to re-aim a fixture or two each season as plants grow into or out of the beam, wipe lenses clear of grime and hard-water spotting, and swap the rare failed LED (quality fixtures run for years). Keep the transformer's connections clean and dry, and check that buried cable hasn't been nicked by a shovel after any garden work. Do that much and a good system essentially runs itself.
What we think
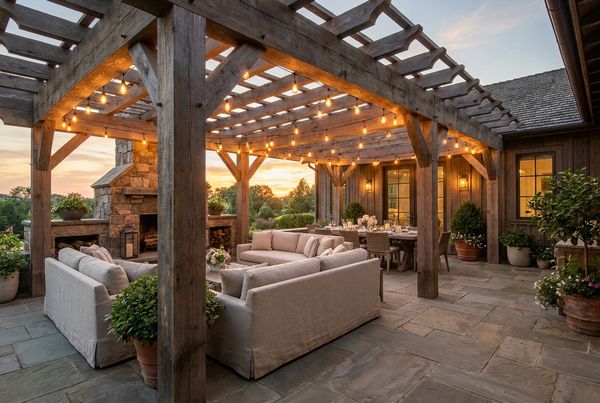
If we had to boil it down: light in layers, keep everything warm at 2700K, hide the source to kill glare, and automate it. A few uplit trees, some moonlighting through the canopy, shielded path and step lights, a wall graze on textured stone, and warm string lights over the seating area will out-perform a yard full of bright floodlights every single time.
The trend line into 2026 is clear — efficient low-voltage LEDs are the default, app-driven automation is standard, warm 2700K light is what separates the great yards from the merely bright ones, and lit water and fire features add the drama. Start with the trees and the seating, add path and wall layers, then tie it all to one scene controller. For the pool-specific side of the plan, see our pool lighting ideas guide, and browse the wider pool landscaping ideas hub to see how light ties every other element of the yard together after dark.
Design Gallery
6 more ideas to save — tap any photo to view full screen.

Kelly E.
Pool Design Editor, PoolPad
Kelly has spent 10+ years around residential pools — planning projects, testing gear, and documenting backyard builds for PoolPad. Each design guide is checked against current construction methods and material pricing.
Frequently Asked Questions
What is the best outdoor lighting for a backyard?
What color temperature is best for outdoor lighting?
How do I avoid glare in my outdoor lighting?
Is low-voltage landscape lighting worth it?
How much does outdoor landscape lighting cost?
Can I automate my outdoor lighting?
Are solar landscape lights worth it?
How do I light my yard for security without harsh floodlights?
Can I install outdoor lighting myself?
How much maintenance does landscape lighting need?
Ready to build your dream backyard?
Compare local, vetted pool builders and get matched with pros who can bring these designs to life.
Find a Pool Builder Near You