



There's nothing better than walking out to a sparkling pool on a hot day. But clear water takes more than filling it with a hose. The real work is the chore people love to skip: testing and balancing your water chemistry.
Every pool owner has a trial-and-error story. Mine started with a green-tinged pool and a visit from a brave but disappointed frog. That taught me pool care deserves respect for the science behind it. The right balance of chemicals keeps water clean, protects the pool, and looks after everyone who swims.
You don't need to be a chemist. A good test kit shows your pH, chlorine, and alkalinity, each one key to balanced water. Get the routine down and you'll avoid murky water while adding years to your favorite summer spot.
Your Action Plan
- Grab a test kit or strips you trust.
- Take a sample elbow-deep, away from the skimmer and return jets.
- Set alkalinity first (80 to 120 ppm), then pH (7.4 to 7.6).
- Adjust chlorine to 1 to 3 ppm and add a stabilizer if your pool sits in sun.
- Add chemicals one at a time, let the pump circulate them, then retest.
- Test at least weekly, and more often after rain or heavy use.
Balance Pool Chemicals Effectively
Above-ground pool chemicals can feel like a lot, but they're what stands between you and clear, healthy water. Balancing isn't a one-and-done job. It's a weekly habit that keeps algae, equipment damage, and itchy skin away.
Start with pH and chlorine
These two shift the most. An off pH hurts both the pool and the people in it, so aim for a steady spot between 7.4 and 7.6 to avoid corrosion or scale. Adjust slowly. Add a little at a time and let the pump move it around before you retest.
Chlorine is your main defense against bacteria, and it should sit around 3 parts per million. Watch the sun, which burns through it fast. If you're using liquid chlorine, protect it with cyanuric acid unless your pool sits in the shade.
The supporting players
Alkalinity keeps your pH steady and should stay between 80 and 120 ppm. Calcium hardness and products that remove copper and rust aren't a weekly worry, but they still protect your pool from problems you can't see.
Hold pH between 7.4 and 7.6 and free chlorine between 1 and 3 ppm, and most other problems take care of themselves.
Test and Monitor Water Levels
Testing your pool water is like watching your car's fuel gauge. You wouldn't leave on a road trip without checking the gas, and you shouldn't plan splash-filled weekends without checking your pool.
Pick your tools and take a clean sample
Test strips are popular because they're cheap and easy, reading the basics like pH, chlorine, and alkalinity fast. For more precision, use a liquid test kit or digital reader. Either way, take a clean sample at elbow depth for an accurate reading.
Weekly tests are your safest bet, but heavy use, a big rain, or recent chemical additions may mean checking more often. Each reading, from cyanuric acid to calcium hardness, tells you something about your pool's health. Keeping pH between 7.4 and 7.6 keeps swimmers comfortable and helps your chemicals work, while free chlorine between 1 and 3 ppm keeps algae and bacteria away.
Watching these levels does more than head off algae or stinging eyes. It protects your investment and stretches the life of your equipment.
Adjust pH and Alkalinity
Balancing pH and alkalinity is where most of your attention goes, because these two slip out of range easily and set off a chain of problems.
Set alkalinity first
Alkalinity is the quiet hero. It buffers your pH, stopping sudden swings that frustrate you and your filter. To raise it, reach for baking soda, which is simple and works well. If it runs too high, a pH decreaser or muriatic acid eases it back. Start here, since alkalinity shapes your pH and makes the rest easier to fine-tune.
Then dial in pH
Once alkalinity is set, your pH usually falls in line. If it drops below the ideal 7.4 to 7.6 range, soda ash or a pH increaser will lift it. If it climbs too high, a pH decreaser or muriatic acid brings it down. Work through these two in order and your chlorine can do its best work.
Always set your alkalinity first, since it steadies the pH and makes every other adjustment easier.
Manage Chlorine and Stabilizers
Chlorine does the heavy lifting, keeping bacteria and algae in check. But without the right balance, it either stops working or turns too harsh, leaving you with stinging eyes and even pool damage.
Free chlorine, combined chlorine, and shocking
Keep free chlorine between 1 and 3 ppm. That range sanitizes well without making anyone uncomfortable. Combined chlorine should stay below 0.5 ppm. If it climbs higher, it's time for a shock treatment. A shock, done weekly or after heavy use, refreshes your free chlorine and clears out chloramines, the stuff behind that strong chlorine smell around some pools.
Don't skip the stabilizer
Cyanuric acid, often called a chlorine stabilizer, shields chlorine from the sun's UV rays, which can burn through it fast. It should stay between 30 and 50 ppm. If you use liquid chlorine or run a saltwater pool, a stabilizer is a must, especially in direct sun.
Without cyanuric acid, the sun burns through your chlorine before it can do its job.
Test Water for Optimal Health
Testing isn't just a chore. It's the habit that keeps your summer full of safe, splashing fun. Picture a family barbecue where everything was perfect until a few itchy eyes sent guests climbing out. You can avoid that by checking your water often, starting with pH and chlorine, since those numbers shift fast with swimmers, weather, and sunlight.
Pick up either test strips or a liquid kit. If reading strip colors feels like cracking a code, a digital reader makes it easier. Good testing starts with a good sample, so push a cup elbow-deep, turn it upright, and stay away from skimmers and return jets.
Then dip a strip, wait for the colors, and match them to the chart. You know the targets: pH between 7.4 and 7.6 and chlorine around 3 ppm. Test at least once a week, and more often during pool parties or after heavy rain. With practice, this becomes second nature and leaves you more time to enjoy lazy afternoons.
Test and Adjust pH Levels
Testing and adjusting pH is a lot like tuning an instrument. When the pH is right, every part of your pool works together for a safe, easy swim.
Gather your tools first: a reliable test kit and the chemicals you'll need. Test strips give a quick look, but a liquid kit reads more precisely, like swapping a rough sketch for a detailed blueprint. Take your sample elbow-deep, away from the skimmer and return jets, so you catch water that reflects your pool's real condition. Then follow the kit's directions and read the pH. It should land between 7.4 and 7.6.
If you need to adjust, don't rush. Add pH increasers or decreasers, such as soda ash or muriatic acid, a little at a time while the pump keeps the water moving. Give the chemicals at least 20 minutes to mix in before you retest. That steady rhythm keeps everyone's swim clear and irritation-free while protecting the pool.
Balance Pool Chemicals Safely
Keeping your family safe while your pool stays clean starts with balancing your chemicals the right way. Think back to the last time you baked cookies. The right amount of each ingredient mattered. Same idea here. Add chemicals one at a time, and never mix them outside the water, since that can cause dangerous reactions.
Alkalinity, then pH, then chlorine
Settle the alkalinity first, since it sets you up to adjust the pH. If it's too low, baking soda helps. If it's too high, reach for a pH decreaser or muriatic acid. Once alkalinity is set, fine-tune your pH into the 7.4 to 7.6 range so swimmers stay comfortable and your chlorine works its best.
Chlorine comes next. Whether it's tablet, granule, or liquid, it needs time to blend in, so check the level a few hours later. If you use dichlor or trichlor, the built-in cyanuric acid shields chlorine from the sun. With liquid chlorine, add a stabilizer separately when your pool gets a lot of sun. Let each chemical spread before you retest, and keep the pump running the whole time.
Add chemicals one at a time, let the pump circulate each one, and never mix them outside the water.
Select the Right Testing Kit
Picking the right test kit makes all the difference, because so much rides on accurate readings.
Strips, liquid kits, and digital testers
Test strips are a favorite because they're easy and affordable. They're great for regular upkeep, giving you quick numbers for pH, alkalinity, and chlorine. The catch is that not everyone finds the color-matching exact, which can leave you unsure of your true levels.
For a more precise read, a liquid test kit is worth the money. It takes more effort but gives detailed results, a lifesaver if your pool's chemistry bounces around. A friend switched to a liquid kit after fighting stubborn algae, and the detailed results caught an imbalance she'd missed.
Then there are digital testers, which take the guesswork out of matching colors. They cost more, but their ease and accuracy can be worth it if you're serious about keeping your water pristine. Match your pick to your own needs and comfort level.
Adjust pH and Chlorine Levels

Adjusting pH and chlorine can feel like walking a tightrope, but once you get the hang of it, you're rewarded with clear water that's inviting and safe. These two hold off algae, bad odors, and rusted equipment.
Test them at least once a week with a reliable strip or liquid kit. Every pool has its own quirks, often shaped by weather or use. Mine went sideways after a weekend party, leaving me with murky water and irritated eyes. The strip showed a high pH and low chlorine. I've learned to handle alkalinity first, since it buffers the pH, then adjust the pH. A pH increaser works when the water's too acidic, and a pH decreaser or muriatic acid helps when it's too basic.
Then turn to chlorine. Tablets or granules are your best bet for steady levels. Drop them in the skimmer or a floater and let them work. If your pool sits in the sun, cyanuric acid is essential. Add chemicals slowly and let each one circulate before anyone swims.
Test Water Regularly
Regular testing can feel tedious, but the payoff is worth it. Your water's health depends on steady monitoring of the levels that shift the most, like pH and chlorine. Let them slide and you'll end up with murky water, algae, and, over time, damaged equipment.
Once a week is the minimum, but check more often during heavy use, after a big rain, or right after adding fresh chemicals. With strips or a liquid kit, you can quickly read the key numbers: total chlorine, free chlorine, pH, alkalinity, and cyanuric acid.
For accurate readings, don't sample near the skimmer or return jets. Take your sample from the middle of the pool, elbow-deep. A digital reader might be worth it if strips leave you guessing. This one simple step means your adjustments rest on solid numbers, keeping your pool clear and ready for a dip anytime.
Balance pH Levels First
Good pool care starts with one key step: balancing your pH. Left alone, an off pH can turn your pool into a home for algae, sting swimmers' eyes, and wear down your equipment. Ever felt that burning in your eyes after a swim? Bad pH is a likely culprit.
The pH scale measures how acidic or basic your water is, and you want your pool between 7.4 and 7.6. Those numbers look minor, but they hold the key to a safe, pleasant swim. Start by testing with a liquid kit or easy-to-read strips. A friend swears by digital readers, but whatever you choose, do it consistently. Regular testing catches small shifts before they turn into big problems.
When you need to adjust, a pH increaser like soda ash raises a low reading, while a pH decreaser or muriatic acid brings a high one down. It's a bit like baking, where the right order and amounts matter. Handle your pH first and you set the stage for better chlorine sanitizing.
Adjust Chlorine Effectively
Getting the chlorine right can feel like a chemistry experiment gone wrong. Picture hosting a party only to find the water's turned a lovely shade of green because the chlorine went rogue. Here's how to avoid that mess.
Keeping chlorine in the 1 to 3 ppm range sanitizes the water while holding algae and bacteria back. Start by testing with reliable strips or a digital reader that measures free and total chlorine. If your free chlorine is low, reach for chlorine tablets or granules. They dissolve slowly, feeding a steady supply, which helps during the busy summer months.
For a quick boost, liquid chlorine works faster but needs adding more often. After you add it, circulate the water for about an hour and retest. And remember, if your combined chlorine (total minus free) tops 0.5 ppm, it's time to shock the pool with a bigger dose to break down contaminants and bring back the water's clarity and smell. If you've got a saltwater pool, keep an eye on salt levels so the generator runs well.
Use Test Strips for Accuracy
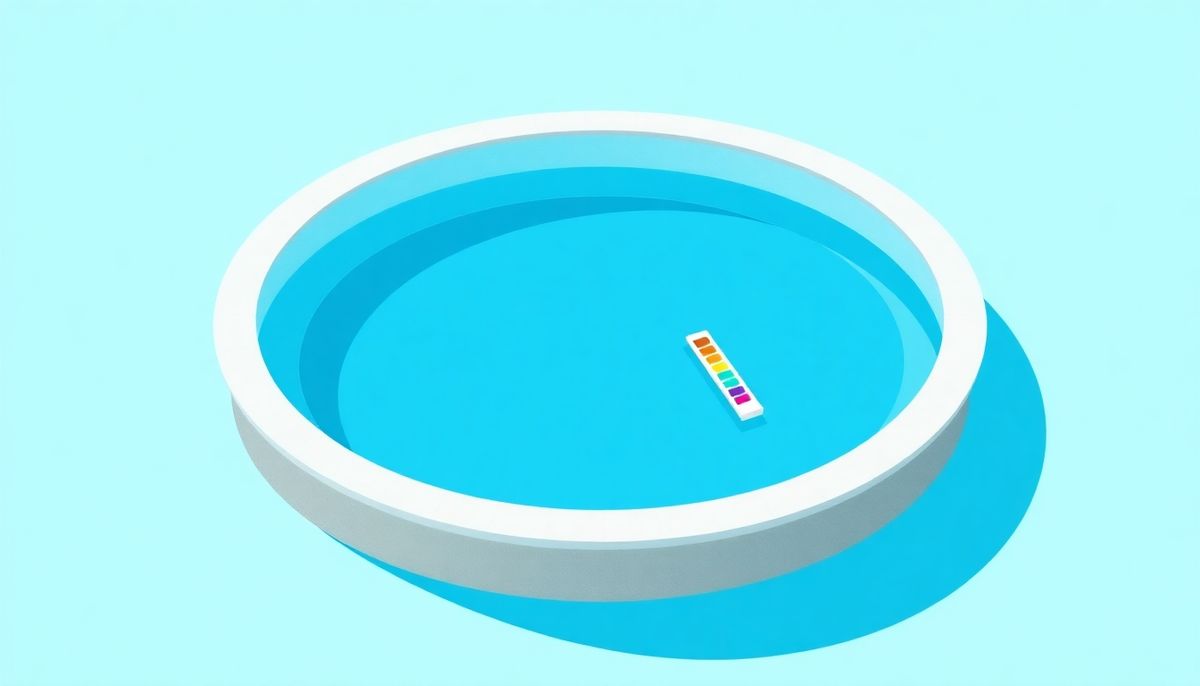
Test strips are your go-to tool for quick, cheap checks, and they're a staple for new owners and old pros alike. The move is simple, but what it tells you matters.
Take a water sample away from the skimmer or return jets, so over-chlorinated water doesn't throw off your reading. Dip the strip in quickly, then hold it still in the air for about 15 seconds. The colors slowly come up, and each shade tells you something about your pool's chemistry.
Then match the strip to the guide on the packaging. Each color shift reveals something about your pH, chlorine, and more, quietly warning you about problems that could lead to algae or damaged equipment. Test at least once a week, or more often during heavy use or rain. Make strips a regular part of your routine and you'll keep the water safe and fun all season.
Collect a Water Sample
To keep your pool water crystal clear, a good water sample is your first step. It sounds simple, but a well-taken sample saves you plenty of headaches later.
Where and how to collect
Pick the right spot, not too close to the skimmer or return jets, where moving water can throw off your reading. Grab a clean, clear cup, hold it upside down, and push it elbow-deep into the pool. That depth catches water that shows your pool's real chemistry, not just the surface or edge. Once it's under, flip the cup right side up to catch your sample.
Test the water right after you collect it, using strips or a liquid kit. Strips give quick results, while a liquid kit offers more precision if you like a hands-on approach. Don't let the sample sit too long, since time can shift its chemistry. Testing once a week is a solid rule, but add extra checks after rainstorms, heavy use, or a fresh top-off, all of which change your pool's chemistry fast.
Choose the Right Test Strips
Picking the right test strips matters if you want a healthy place to swim. One summer I grabbed a basic strip that only tested pH and chlorine, and it led to an algae bloom I could have headed off with fuller testing.
Start by figuring out what you need to measure. Standard strips usually cover pH, chlorine, and alkalinity. For a deeper look, pick strips that also read total hardness, cyanuric acid, and things like copper and iron. That wider view can flag trouble before it grows, saving you time and money.
It's also smart to choose strips that work with a digital reader if color matching gives you fits. Store your strips somewhere cool and dry, and check the expiration date before you use them. People skip that step all the time, and it can throw off your readings. The best strips fit your pool's needs and how comfortable you feel testing.
Analyze and Compare Results
Reading your pool's chemical results is a bit like solving a mystery. Once you've dipped the strip and matched it to the color guide, you're left with numbers that hold the key to a clear pool.
Read the numbers, then compare
Focus first on the two that move the most: pH and chlorine. If your pH drifts outside the 7.4 to 7.6 range, the water gets irritatingly acidic or the chlorination goes weak. A free chlorine level below 1 ppm can invite algae, while anything above 3 ppm can sting your eyes.
Next, compare your current numbers to past readings. That helps you catch trends or recurring problems. Maybe last week's rain watered down the pool and dropped your chlorine, or the summer sun is eating your cyanuric acid and leaving chlorine open to UV. Spot the patterns and you can adjust doses ahead of time, saving hassle and money.
Avoid Common Chemical Mistakes
In pool care, rushing through chemical handling is a common trap. It's not just knowing which chemicals to add, but the order and timing too. A friend's pool turned cloudy overnight because they dumped chemicals in without letting each one spread out first. That misstep wasted both their effort and their money.
The mistakes that trip people up
One big one is adding different chemicals at the same time. Mixing them outside the pool can spark dangerous reactions. Patience wins instead. Add chemicals one at a time and give each at least 20 minutes to circulate.
A lot of people also skip the key step of setting alkalinity before pH. Alkalinity acts as a buffer that keeps your pH steady. Ignore that order and you're stuck playing catch-up, like laying a foundation before you build the house.
Finally, never underestimate the sun. Cyanuric acid protects your chlorine from UV rays, so it lasts longer. Without it, you'll be forever chasing stable chlorine.
Balance pH and Chlorine Levels
Balancing pH and chlorine keeps your pool a getaway instead of a headache. Start with the basics: pH should sit between 7.4 and 7.6, where the water is neither too acidic nor too basic. That range keeps swimmers' skin happy and guards your equipment against corrosion.
Now chlorine, your pool's unsung hero. Free chlorine at 1 to 3 ppm is your front line against bacteria and algae. Too little and your pool turns into a biology experiment gone wrong. Too much and you're stuck with a bleach-like smell and stinging eyes.
Last summer, after a surprise family reunion in the backyard, my pool's pH and chlorine went haywire. A sudden crowd of swimmers will do that. Quick action with a pH increaser and some chlorine shock saved the day. The lesson: steady checks and quick fixes keep small problems from turning into big ones.
Simplify Testing with Right Tools
Pool care can feel like a lot, but the right tools turn a tricky chore into a simple one. A friend once spent a whole afternoon squinting at test strips, sure she was reading hieroglyphs instead of pH. There's an easier way. Pairing a digital reader with your usual strips brings clarity where the colors blur, giving you exact numbers with one click.
Test strips are still a budget-friendly staple for weekly checks, covering the basics like pH, alkalinity, and chlorine. If you want a fuller picture, a liquid kit digs deeper and reads things like cyanuric acid and calcium hardness more accurately. Each method has its strengths, but what counts is doing it consistently.
When you test, sampling right is key. Scooping water elbow-deep gives you a true read, not a skewed one from near the skimmer or return jets. Test weekly, or more often if your pool sees a lot of use or heavy rain. With these tools, you can manage your pool with confidence and spend more time enjoying the water.
Conclusion
You've now got a real feel for keeping your pool clean, balanced, and ready for a swim. None of it is complicated once the routine clicks. Test often, set alkalinity first, keep an eye on pH and chlorine, and give each chemical time to work. Do that and clear water stops being a mystery and becomes your normal.
If you want to go deeper, our free Pool School course walks you through everything, from basic upkeep to advanced troubleshooting. You'll learn how to:
- Save thousands on pool repairs and chemicals
- Keep your water crystal clear year-round
- Prevent and solve common pool problems
- Master water chemistry with confidence
Over 10,000 pool owners have already changed their routine with it. Get started with our free Pool School course today!
What you need
Stock a test kit or strips, a pH increaser and decreaser, chlorine, and cyanuric acid so you can test and adjust the moment your numbers drift.