















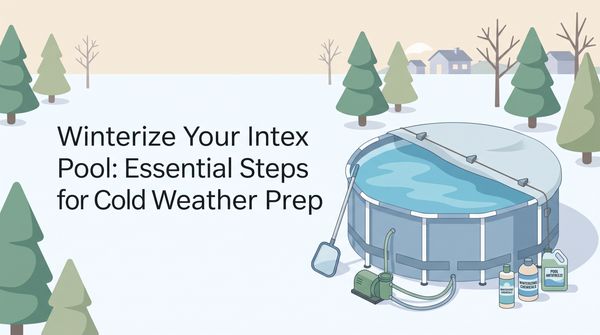
As the days get shorter and the air turns cold, getting your Intex pool ready for winter deserves real attention. Skip it, and you could face expensive repairs or lose your backyard escape altogether. Winterizing is like tucking your pool in for a long sleep, keeping it safe until the sun comes back.
Plenty of pool owners think closing up just means pulling a cover over the top and walking away. But anyone who's dealt with burst seams and murky water come spring knows better. Getting the small details right saves you future headaches and helps your pool last longer.
My first year, I skipped the winterizer and spent a week scrubbing algae off the liner once the weather warmed up. Since then, I've stuck to a careful, step-by-step routine, and every spring my pool is ready and waiting. This guide walks you through the key steps to protect your Intex pool, turning a job that feels overwhelming into something manageable.
Your Action Plan
- Balance the water chemistry to pH 7.4-7.6 and alkalinity 100-150 ppm, then add shock and a copper-free algaecide.
- Clean the pool by vacuuming the floor and scrubbing the walls.
- Drain the water with a garden hose pointed away from your house.
- Take the pool apart, then clean and fully dry every part.
- Dust the liner with talcum powder and fold it carefully.
- Store all the parts in a dry, frost-free spot until spring.
Protect Your Pool Liner
Clean and dry the liner first
Your Intex liner is the only thing between you and a summer full of leaks, so it's worth protecting. Get it spotless before you store it. Leftover debris or moisture can grow mold and mildew that quietly damages the material over winter. A gentle scrub with a soft cloth and mild cleaner does the job, then rinse and dry it well.
Once it's dry, dust it with a little talcum powder so it won't stick to itself when folded. Folding it neatly is a bit of an art, like wrestling a fitted sheet into shape. Fold it into manageable squares and avoid sharp creases, which weaken the material.
Store the liner somewhere climate-controlled, away from rodents and big temperature swings. This extra care feels tedious, but you'll start each new season knowing you did it right.
Prepare for Winter Storage
Gather your gear and start early
Intex pools need a gentler touch than sturdy above-ground models. Start by gathering everything you'll need. The owner's manual is your best guide, and if it's vanished into the garage clutter, a quick online search turns up a copy. Timing matters too. Start well before the first frost so you're not scrambling when a cold snap hits.
Next, get things clean. Scrub the walls and vacuum the bottom so no debris is left behind, which is what keeps spring from turning into a nasty surprise. Draining the water through a garden hose takes patience more than speed, so keep an eye on how it's going. Take each part apart, dry it thoroughly, and give it a safe, dry spot until warmer days arrive.
Drain and Disassemble Pool
Drain, then take it apart
Start by disconnecting all power sources, since no one wants an unexpected jolt. Remove accessories like skimmers and ladders, clean and dry them, and set them aside somewhere dry. Then deal with the water. Attach a garden hose to the drain connector and point the other end away from your home's foundation, because standing water can do real damage.
As the level drops, start cleaning. Use a mild cleaner and soft cloth on the walls, and skip harsh chemicals that could damage the liner. Once it's low enough, gently lift the pool's edge to help the last drops out. Remove the drain hose and secure the inner and outer plugs. If your pool has a frame, work backward through the assembly steps, cleaning and drying each piece as you go.
Protect Against Ice Damage
The same soft materials that make Intex pools easy to set up leave them wide open to ice damage. Water left to freeze expands, stretching and cracking the liner. Draining and taking the pool apart before temperatures drop is your best defense.
Take the pool apart while the weather is still mild, because freezing water can split the liner overnight, and that's not a quick fix.
If you live somewhere with mild winters, you have more room to breathe, but you still need care. Keep the water balanced with a pH between 7.4 and 7.6 and use winterizing chemicals to fend off algae and bacteria. Even then, a sudden cold snap is always possible, so be ready to drain and store quickly if you need to.
Drain and Store Properly
Take your time and store parts indoors
Draining and storing your pool properly protects its lifespan and your peace of mind. The job might stretch over a few days, so patience pays off.
Power down first, then remove accessories like skimmers and ladders, clean them, and let them dry in a safe spot. To drain, attach your garden hose to the drain connector and point it away from the house. Check on it now and then to make sure the hose stays put and the water keeps flowing.
Once the pool is empty, wipe down the liner with a mild cleaner and let it dry completely to prevent mold. A sprinkle of talcum powder or cornstarch helps. Store all the parts indoors somewhere dry and warm where frost can't reach, and keep them together so you're not playing hide-and-seek in spring.
Intex models need a little more finesse than regular pools because of their lightweight materials. Good prep is the difference between a pool that greets you in spring and one you have to replace.
Spend a day cleaning: clear the debris, vacuum the surfaces, and check the lining for damage while you're at it. Then drain, take the pool apart, clean and dry every part, and store them somewhere that won't freeze. If you live in a milder climate and want to leave your pool up, balance the water chemistry to prevent algae and bacteria, and use winterizing chemicals made for your climate.
Clean and Drain the Pool
Check local rules before you drain
Disconnect all power sources, then detach and clean accessories like ladders and skimmers before drying and storing them. If your strainer grid is grimy, consider replacing it for a fresh start next season.
Vacuum the floor and walls so you don't get unpleasant surprises in spring. Check with your local authorities about the right way to dispose of the water, because the legal and environmental side matters and you don't want to harm your property or the area around it.
To drain, secure your garden hose to the drain connector, point it away from any structures, and give it a firm push into the valve. As the water drops, scrub the walls with a mild cleaner and soft cloth, skipping harsh chemicals that ruin the delicate lining.
Store Pool Components Safely
Clean, dry, and label every part
Winterizing the components is just as important as the pool itself. Clean and dry every piece, including pumps, hoses, ladders, and skimmers. Even a hint of leftover moisture invites mold or corrosion. One spring I found a forgotten damp hose that had turned into a mildew farm, so I don't skip this anymore.
Pick a storage space that shields your gear from the elements. A dry, mild basement or garage is ideal. Avoid anywhere freezing temperatures might sneak in, since cold makes materials brittle. Label boxes or use bins for smaller parts, and group similar items together: pool tools in one bin, frame pieces in another. Everything snaps neatly back into place when winter passes.
Dry every part completely before you store it, because trapped moisture is what turns your gear into a mold and mildew problem by spring.
Clean and Disassemble Accessories
Cleaning and storing accessories matters just as much as prepping the pool. Gather your skimmer, ladder, and any detachable parts. Rinse each with a hose to wash off chlorine and debris, and use a soft brush with mild soap on stubborn spots. Let everything air dry completely so mold can't grow in storage.
Check your strainer grids and pull them out if they're clogged. These parts are cheap, so swap in fresh ones if the gunk won't budge. Let a little air out of inflatable accessories so the material doesn't stretch over time. Store it all in a cool, dry place like a garage shelf or bin, where it's easy to find when the weather warms up.
Prepare Your Pool for Winter
Gather your supplies, starting with the owner's manual. Intex's website has downloadable versions if yours is missing. Remove and clean all accessories, then vacuum the pool well.
If you're keeping the water in, balance the chemistry with a pH between 7.4 and 7.6 and total alkalinity in the 100 to 150 ppm range, then add a winter algaecide. In colder climates, draining is a must to avoid ice damage. Connect your garden hose to the drain connector, point the water away from the house, and wash the walls as it empties. Once it's drained, fold the liner with care and store all the components in a dry, indoor space safe from freezing.
Manage Draining and Storing
Get the liner bone-dry before folding
Draining is more than turning a valve. Attach your garden hose to the drain connector, point the outflow well away from any structures, and follow any local rules for disposing of the water.
As the level drops, sediment and debris become easier to see, so scrub the sides with a mild cleaner. Be gentle, since abrasive tools damage the liner. Clean and dry any inflatable parts fully before storage.
Make sure the liner is completely dry before you fold it so mildew can't set in. A bit of talcum powder absorbs leftover moisture and keeps it from sticking. Fold it down without rushing and store it somewhere cool and dry.
Clean and Store Pool Accessories
Don't overlook the accessories that served you all summer. Gather the skimmer, ladder, and any floats or toys, because there's always one forgotten noodle sitting at the bottom. Rinse each item with fresh water to wash off chlorine or salt that corrodes surfaces over time, using a soft brush and non-abrasive cleaner for stubborn grime.
Let everything air dry completely, since moisture leads to mold and mildew. Then store it all in a cool, dry place, like a corner of the garage or a bin in the basement. A little care now means fewer surprises, and fewer expenses, when you're itching to jump back in next year.
Balance Water Chemistry
Balance the water chemistry
Getting the water chemistry right protects your pool while it sits idle. In my own backyard, it's what kept the spring algae blooms away.
Test the water and aim for a pH between 7.4 and 7.6. That sweet spot keeps things stable and cuts the risk of corrosion or scaling. Total alkalinity should sit between 100 and 150 parts per million (ppm), acting as a buffer that holds the pH steady.
Once those levels are dialed in, add a winterizing kit. It usually includes a strong shock treatment and a copper-free algaecide. The shock breaks down leftover sweat, sunscreen, and bits of leaves, while the algaecide stops growth from taking over during the off-season. Let the chemicals circulate for at least a day.
Balancing your water before you close up is the difference between a clear spring opening and a swampy green mess.
Prepare for Cold Weather
Gather your winterizing supplies: a good pool cover, cleaning tools, and winterizing chemicals. The owner's manual has instructions for your model, and the Intex website has a digital copy if yours is lost.
Treat winterizing as a multi-day project and start early. Drain with the water pointed away from your foundation. Once the pool is empty, clean and dry all the parts, check inflatable pieces for leaks and deflate them carefully, and sprinkle cornstarch on the liner before folding so it won't stick. Store everything in a dry, mild place, then go enjoy the season knowing your pool is safely packed away.
Drain and Disassemble the Pool
Start by making sure the water is clear and free of debris. Use a skimmer and vacuum so nothing lingers on the surface or walls. Check local guidelines on water disposal to avoid fines, and unplug the pool from any electrical source before you go further.
Find the drain plug inside the pool and leave it in place; the water will nudge it open. Secure a garden hose to the drain connector, point the far end away from your house, and attach the connector to the valve. As the level drops, gently clean the walls with a soft cloth and mild cleaner. Once it's drained, dry the liner before folding, then store the frame pieces and liner somewhere dry and secure.
Store Equipment Safely
Store your gear so it survives the winter
Storing your equipment deserves as much attention as the rest. A neighbor once stored his liner the wrong way and found it had become a chew toy for mice by spring. Avoid that.
Take apart every component and clean each with mild soap and warm water, including the liner, pump, and hoses. Let everything air dry completely. Drying things fast with a towel and calling it done once left me with a musty surprise the next summer. Then find a dry, temperature-controlled space like a basement, garage, or closet, away from damp and big temperature swings. Store small parts like plugs and valves in labeled containers, and dust the liner with talcum powder before folding so it lifts apart easily next season.
Use Winterizing Chemicals
Add the right winterizing chemicals
Winterizing chemicals keep your water clear and stop algae and bacteria from taking over while the pool sits unused. Skip them, and you could face green water in spring.
Start with a shock treatment to kill off any lingering contaminants. Think of it as a reset button for your water. Follow with a copper-free algaecide, which is gentler and less likely to stain the liner. In colder climates, add pool antifreeze to the plumbing lines so water can't expand and crack them. Doses vary by model and region, so double-check what's compatible with your Intex pool and local weather, then let the chemicals circulate for a full day.
Give your pool a thorough clean: remove the debris, vacuum the sides, and scrub away any algae. Then drain it by connecting your garden hose to the drain valve. Apply your winterizing chemicals to prevent growth over the off-season, checking your owner's manual for the right doses.
Remove and store accessories like ladders and filters in a dry place. Finally, cover the pool securely to keep out leaves and debris. Remember, a pool cover is not a safety cover, so keep the area secure from wandering pets or children. The effort now makes for an easy return to pool season next summer.
Conclusion
Now that your pool's safely packed away, you can relax until spring. Do this right and opening day will be quick and painless, with no burst seams or green water waiting for you. If you want to keep learning, our free Pool School course covers everything from basic maintenance to water chemistry, so you can save money on repairs and keep your water clear all year.
What you need
Grab a pool cover, a winterizing chemical kit with shock and a copper-free algaecide, a garden hose for draining, and some talcum powder for the liner before you fold it away.